Sunday, December 13, 2009

A Day at Winnipeg Harvest


I am truly blessed to work with some incredible students.  This year the Grade 8 team decided to take groups of students to a local food agency.  Winnipeg Harvest supports food banks, soup kitchens and many other organizations throughout Winnipeg. Harvest feeds over 47 000 Winnipegers a week.  This in a city with a population of only 800 000 people. 


They are located only a few blocks away from the school. 

3 teams of four students and a teacher supervisor went to Harvest for three half day shifts.  The first day saw the students work on creating emergency kits for harvest.  These kits have one can of protein, one can of vegetables, soup and a grain (pasta or rice).  These kits are then placed into a larger bag with 7 other kits.  These larger bags are then put on pallets to be shipped around the city.
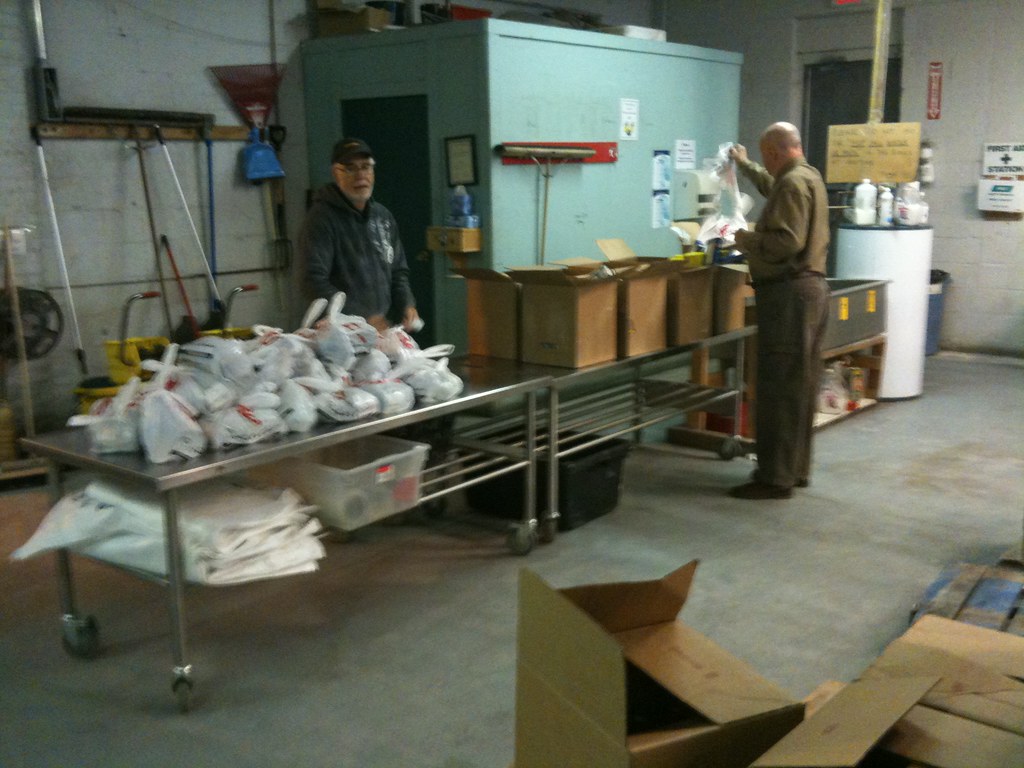
 
Here are the students working on that first day.  They packed enough kits to fill 1 and a half pallets. Sadly we would have done more but we ran out of protein and could not finish the task.


The next 2 crews of students were on onion and potato detail.  Harvest receives produce from local Hutterite  Colonies and Peak of the Market.  These items come into Harvest in large pallets.  They need to be repacked into smaller boxes (banana boxes each weighing 60 lbs).  It was fun to go through the large pallets and find mushy onions and potatoes.  We even found an Alien Onion and a Heart shaped potato.  In the two days the students repacked 4000 lbs of potatoes and onions.
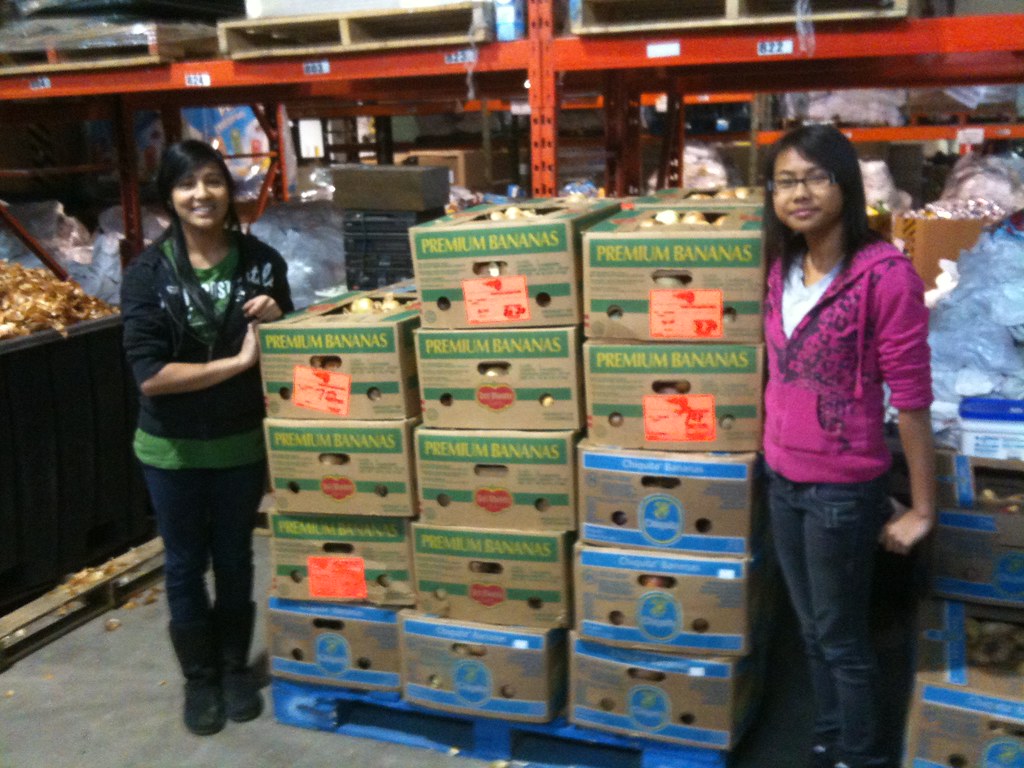


What impressed me the most was when we were about to leave.  Onion skins on the floor and a bit of a mess to clean up.  No one asked but the kids took it upon themselves to clean up the area for the next crew.
Since the trips to Harvest students have been asking if they can go and help.  I do not see any reason to say no.  After all Harvest is just up the street.  Kids can be amazing if you let them be.  Give them a chance and inspire them to become activists and see their world as something more than just a school experience.

Here is the students take on the experience.

Getting a Square Idea.

Three heads are better than one.  I have a brilliant teacher candidate this term.  She really knows her stuff.  I also have a great mentor at this school that always tells me the analogy of slow learning (drawing a turtle on the board) to make me remember the need to go slow when necessary.

Together all three of us yesterday came up with a great activity to get kids to understand the idea of squares.  More specifically.... Can you make a square out of 2 squares tiles, 3 squares tiles etc.  What we came up with was a stroke of genius.

Supplies you will need for this activity are a sheep of cm grid paper and a piece of coloured paper.  On the grid paper you need to cut out 4 10 by 10 squares.  My paper only goes 18 across.  You will get one 10 by to and one 8 by 10 rectangle.  Take a 2 by 10 rectangle to complete the 8 by 10 into a 10 by 10 square.

When we are all done the students have a great representation of how to create the squares of 1, 2, 3, and 4.
Step 1
Glue one 10 by 10 square onto the large foldable sheet of paper.  Get the students to understand the difference between the 100 squares and that this represents 1 whole square.
Once this has been done complete the chart at the top of your paper.  Show the side measure of the square and how 1 x 1 is 1.


You now have to use your second square.  Get the students to figure out the largest square you can make with the second square that has 100 smaller squares in it.  Most students will start to see the pattern of 1.1 x 1.1 is 1.21(11 x 11 =121) and so on.  When you are done this part of the foldable your page should look like this.


The largest square is using 196 smaller squares or 14 x 14.  This is really 1.4 x 1.4 which is 1.96.  Complete the chart like the previous one and have all squares up to 1.4 on the chart. 

Continue with the third square.  If students have not coloured them yet it might be a good idea.  Colour enhances the foldable showing the different squares


You should have completed the blue part of the foldable now.  This means that you have made the largest square possible with 3 squares.  1.7 x 1.7 (17 x 17).

Complete the chart to show that you now have 3 new squares possible.

You now are ready for the last square.  This is the 4th square.  You need to get the students to understand that they now have a perfect square.  2 x 2 = 4. To achieve this they will use the remaining square and all the leftover pieces from the last 2 squares.  Adding 111 small squares will give you a square with the area of 400 little squares or 4 larger squares. 

 Finish the chart to complete it up to 2 x 2 = 4.


This is a great conceptual idea for showing Squares and Square Roots.

Hope you enjoyed the lesson.  Now on to the next post.


Sunday, November 15, 2009

Storytelling in math


It was a simple idea. Get the students to write a simple story and use math to solve it. The story premise was that an alien has landed in your back yard. It will call the rest of the ships if you do not answer 3 proportion questions. Sounds easy right!

The students created simple stories and added great answers from the homework they had been doing over the past few days. I also showed them how to find cc images. They are not cited properly yet but at least the images are cc.

Here are the links to the rooms so you can read them your self.

873
841
817
816

Here is the original assignment. Enjoy

Sunday, November 08, 2009

Making your own Game

I have always wanted kids to become producers of games instead of being only consumers of games.  My favorite games for kids at school are the ones that are flashed based.

Samorst 1


Samorst 2

or
Machinarium


All of these are brilliant story starters for any Language Arts Class.  But how do kids make their own?? Thanks to a tweet from Alec Couros a few weeks ago they can!


Here is a sample game made by a member using a well known Flickr Image.


Fable Forge is a site where you can make your own flash games like those in Samorst land.  No where near as good but you can make them none the less.  It would be interesting to see how many educational games could be made just using simple pictures and hiding things on the screen!! Give it a try and let me know.  I will be trying this out with some of my students later this year.  Hey it is free and gives kids power to create instead of just playing around.  No wait they will be playing around.  Hmmm a win win situation.

Tuesday, October 27, 2009

Baby steps?


On Friday John Evans and I walked 9 colleagues through an inservice on Twitter, Diigo and other aspects of social networking.

Here is the wiki we created for the day.

They got the message.  Great things happened, all participants loved wordle, they really saw the great parts of social bookmarking.... and perhaps twitter might sink in too. It was interesting as the day progressed how many looks of amazement kept on coming.  They were really into learning the tools and figuring out how to integrate them into their lessons and with their team members.

What was different this time? The first thing was all participants were keen to learn.  Different from other sessions I have done. Secondly John and I gave them small ideas that can be used instead of hitting them hard with How to use Wiki's, blogging in your classroom.  This might be what I have been doing wrong up until now...

When you start with these little steps you are able to start the process.  Show how easy some of the technology and applications are to make a simple lesson brilliant.  Wordle.net a simple application has to many lesson possibilities to count.  Start with this instant success, now push participants into a social aspect of the Read Write Web.  We introduced Diigo.  Here you bookmark, and save to a group. This bonds the group together and shows the power of collaboration.

You see where this is going.  Once you have them making a few baby steps, they see the results then......... you go to the big dogs!! You introduce them to wikis blogs, and other pedagogical changing tools.

Enough already it was a great day.  Thank you John. Thank you Sargent Park Staff.

Tuesday, October 20, 2009

Rethinking old tools

A few things are different at the blog this year.  Kids are into doing homework .... assignments on the blog and wanting to do them more frequently.  I am accomidating them right now because they can get what they want.  Are there negative aspects of kids writing more at the blog? I am not sure yet.  Will quality of work suffer because they are doing more assignments.

cc licensed flickr photo by CarbonNYC: http://flickr.com/photos/carbonnyc/2281515041/

One of the beautiful things about the blog was that scribeposts were to be done only once every 35 classes which meant that kids only scribed 4 times a year.  My students have already in 6 weeks created 6 posts.  Twice as many as usual.  So once again I ask has the quality of work suffered.

No.  Work has not suffered.  In fact kids do great are doing even better, good kids are doing great and some just are doing math.  Instead of hitting it out of the park on a few posts kids are getting doubles and triples but still scoring the same amount of runs(do you like my baseball analogy?).

A new beast has emerged in this new class set up.  Commenting.  Kids are commenting so frequently I am amazed by their ability to be an audience.  Between the chat room

cc licensed flickr photo by merezha: http://flickr.com/photos/merezha/2668654829/


20 Oct 09, 20:10
laura: yes, because it has 3 parts, but it is still a 2 TERM ratio :)
20 Oct 09, 20:08
abby: but if theres a comma is that still considered as 3 part ratio??
20 Oct 09, 20:01
laura: and then you just use the last number of the ratio as the denomonator
20 Oct 09, 20:00
laura: but if you add the 2 numbers that have a comma, that becomes the numerator.
20 Oct 09, 19:55
Harvey: laura that isn't a fraction. You can only make 2 term ratios
20 Oct 09, 19:53
laura: ABBY: Unless there is a comma between 2 of those numbers, (4,5:12) you can't
20 Oct 09, 19:39
abby: does anyone know to make a fraction on 3 part ratio??
20 Oct 09, 19:33
Eric.P 8-73: Guys gotta comment on those australian blogs

and leaving 100's of comments every few nights they have got the whole community of learners thing figured out.

So where do I go next.  One mainstay of the blogging program over the past few years have been BOB's. These Blogging on Blogging assignments are meant as reviews before a test.  Last year they were simply a reflection of a few sentences.  This year the assignment was changed.  I have included a commenting component.  The students will do the BOB and then ask a series of questions as a built in study guide for their fellow students.  The other students then will answer the questions in the comments and this will be the studying needed for the test the next day.

Here is their first BOB.

Here are the instructions to complete your BOB on ratios.  Remember this is a way of preparing for a test.  Please take time to do a good job on understanding your ratio unit.

  1. Title Must include BOB and RATIO.
  2. labels, displayname, bob, ratio
  3. You must include one of the pictures from today's lesson.  The easiest way to include it is to use its location address.  Click the picture link provided, right click the picture, copy location.  Once you have copied the location add image to the blog but use add url not browse my computer.  Paste the url into the window and click ok.  Your picture should be there.  (Just get the picture on the post)
  4. Once the picture is at your blog you must create the following.  3 part to part ratios, 2 part to total ratios and 2 three part ratios.  Please for each have a word ratio and ratio notation.
  5. Choose one ratio that you have done and show how to write that ratio in ratio notation, fraction, decimal and percent form.
  6. Choose one ratio that you have written and show how to create equivalent ratios.
  7. Finally create 3 questions that you want people to answer in the comments. Do not make them to hard or too easy. 
  8. Answer your questions in the comment section of your post.  
  9. Go and answer as many questions as you can about ratio at other posts in your room and the other rooms in grade 8.
  10. Look for cheats in comments.  I will post helping hints and questions in comments around the blogs.  

 Now if you have read this far.  CONGRATULATIONS!! Here are 2 examples of the BOB's on Ratio.

Bob 1 Bob 2 Bob 3 Bob 4

Monday, October 12, 2009

The Coin Problem

Today was my first attempt at playing with one of Dan Meyer's lessons. I put up the image that Dan had provided on his blog. 


I then had the students brainstorm questions about the jar of coins.  We sorted them into questions that could be solved using 4math and those that required different ways of solving.  Next I gave them some information about the jar.  I told them that it was all American coin.  This then had them think about the differences between the jars of coins from American Currency to Canadian Currency.  We then brainstormed questions knowing that there was $100 in the jar.

Students had to go home and answer 2 questions over the weekend.  Some got it right away and created wonderful answers to the questions posed in class. This was a cool attempt. Most just did a simple explanation and did not answer the question correctly.

No matter what if a kid posted online over a long weekend a victory was won.  On Tuesday we will go over the questions and posts in class and use ratio tables to help students understand the depth of the questions they created.  Sometimes students need a first draft before they understand the depth of a question.  


Slow and steady wins the race and when money is concerned... all are hooked instantly.

Thanks Dan for a great lesson Idea.

Coin Ratio
View more documents from charbeck1.